 FoneLab


FoneLab for iOS Help
Everything You Need to Know

FoneLab for iOS can easily recover the data lost due to jailbreak, iOS upgrade, etc. It is able to recover the lost or deleted data from iTunes backup files, iOS devices and iCloud backup files. So you don't need to worry about losing data ever again!
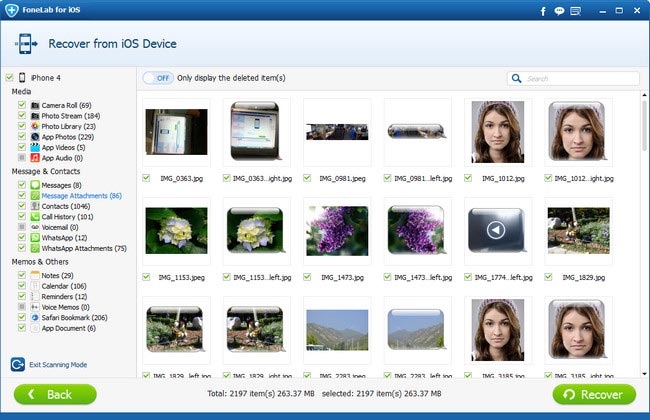
Recover from iOS device
| Supported Devices | Supported Data |
| iPhone 4/3GS, iPad 1 and iPod touch 4 | Recover All Deleted Data (19 types): Contacts, Messages, Call history, Calendar, Notes, Reminders, Safari bookmark, Whatsapp, App Document, Camera Roll, Photo Library, Photo Stream, App Photos, App Videos, App Audio, Message Attachments, Whatsapp Attachments, Voice Memos, Voicemail. |
| iPhone 5s/5c/5/4S, iPad 4/3/2/Air, iPad mini/mini 2 and iPod touch 5 | Recover Deleted Data (8 types): Contacts, Messages, Call history, Calendar, Notes, Reminders, Safari bookmark, Whatsapp Back up Existing Data (11 types): App Document, Camera Roll, Photo Library, Photo Stream, App Photos, App Videos, App Audio, Message Attachments, Whatsapp Attachments, Voice Memos, Voicemail. |
Recover from iTunes backup file
| Recover Deleted Data (8 types): Contacts, Messages, Call history, Calendar, Notes, Reminders, Safari bookmark, Whatsapp Extract Data from Backup (11 types): App Document, Camera Roll, Photo Library, Photo Stream, App Photos, App Videos, App Audio, Message Attachments, Whatsapp Attachments, Voice Memos, Voicemail. |
Recover from iCloud backup file
| Backup Deleted Data (7 types): Contacts, Messages, Call history, Calendar, Notes, Reminders, Safari bookmark Extract Data from Backup(9 types): App Document, Camera Roll, Photo Library, App Photos, App Videos, App Audio, Message Attachments, Voice Memos, Voicemail. |
System Requirements
OS Supported: Windows XP (SP2 or later), Windows Vista, Windows 7, Windows 8
CPU: 800MHz Intel or AMD CPU, or above
RAM: 512MB RAM or more
Registration
Click  to open the registration window as below. Input "Email Address" and "Registration Code", and click "Register" button to finish registration.
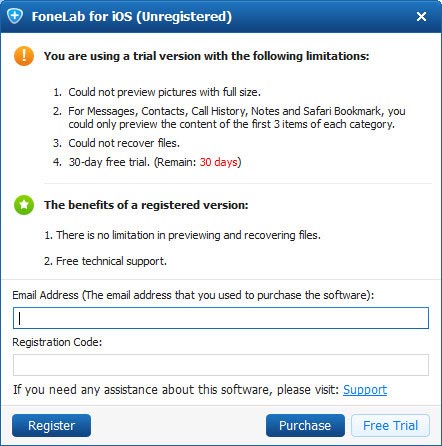
NOTE:
Registration Code: A string of characters marked as Activation key, license code or KEYCODE(S) in the order confirmation letter you received after the successful purchase.
Edit Preferences
Click  -> "Preferences" option to open Preferences Window.
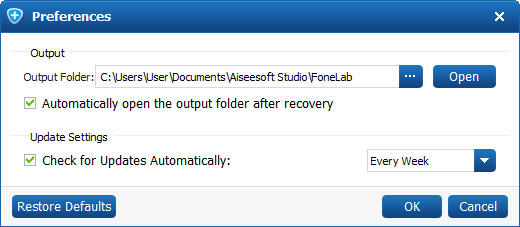
Output:
Click  to select a storage location.
Update Settings:
Here you can let this app automatically check for program updates or not. If choose automatically update, you can also set for the update time interval (Every Day/Every Week/Every Month).
Tutorial
Recover Data from Your iPhone, iPad and iPod touch
For iPhone 5s, iPhone 5c, iPhone 5, iPhone 4S, iPad Air, iPad mini 2, iPad 4, iPad mini, The New iPad, iPad 2 and iPod touch 5
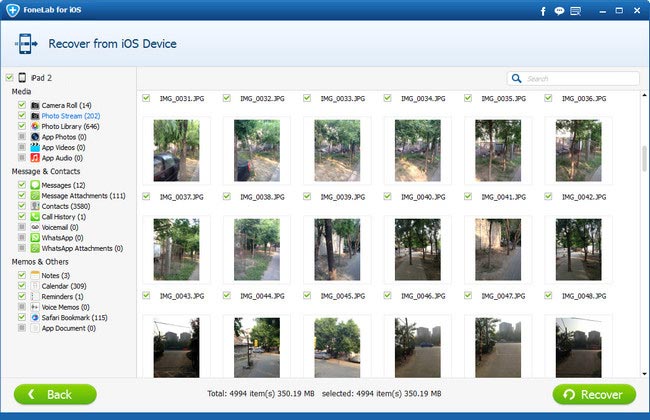
1. Run the software, select "Recover from iOS Device" mode.
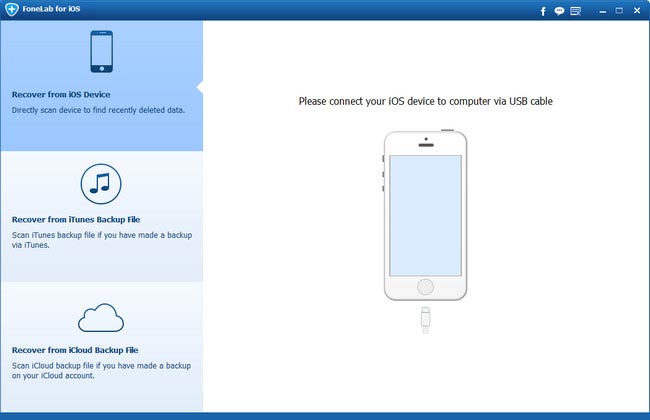
2. Connect your iOS device to computer and click "Start Scan" button.
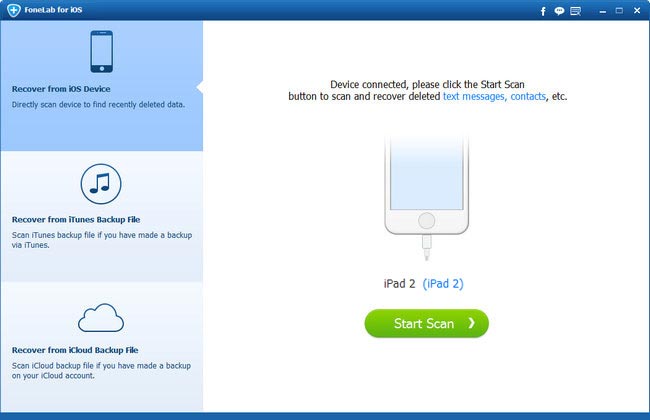
3. Check the files you want to recover, click "Recover" button and then save your data in local disc.
For iPhone 4, iPhone 3GS, iPad 1 and iPod touch 4
Step 1. Run the software, select "Recover from iOS Device" mode and connect your device to your computer.
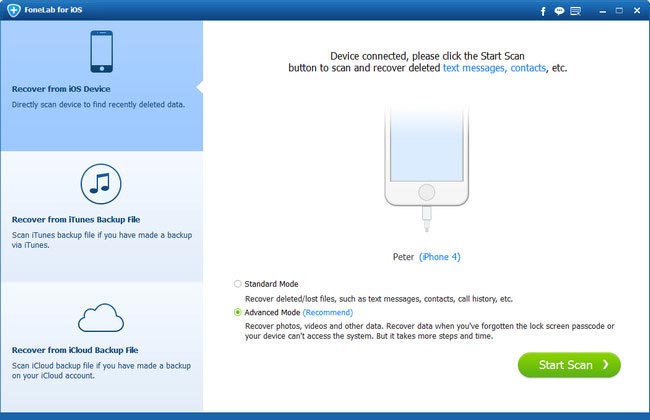
Step 2. Select one mode and click "Start Scan". For Advanced Mode, you need to download a plugin to enter device scanning mode.
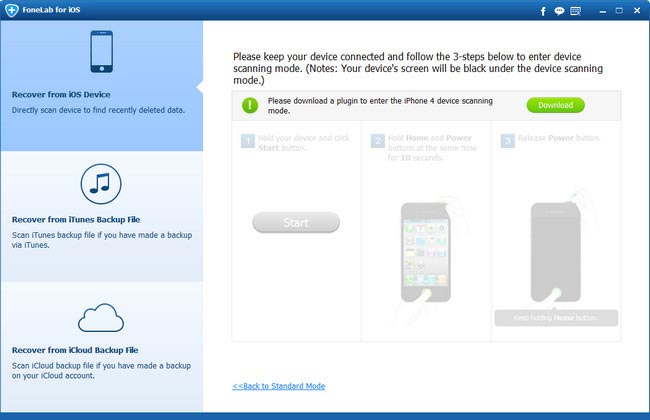
Step 3. Please click "Download" to download and install the plug-in.
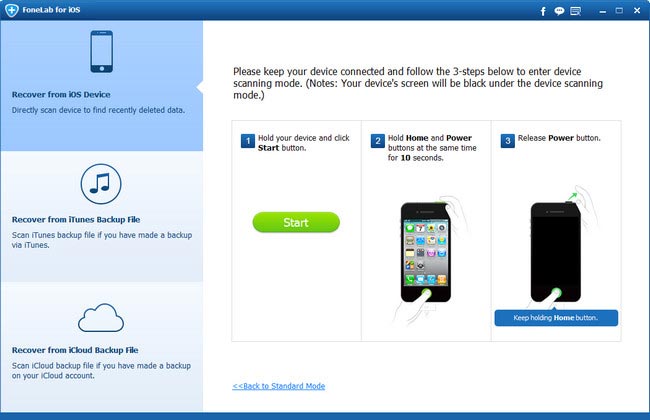
Step 4. After installing the plug-in, please follow the three steps below to enter scanning mode.
1. Hold your iOS device and click the Start button.
2. Press and hold the Power and Home buttons at the same time for 10 seconds.
3. Release Power button and keep holding Home button.
Step 5. Select the files you want to retrieve, click "Recover" to regain and save your data in local disc.
Click "Exit Scanning Mode" button or directly close the software to launch your device into normal mode.
Recover from iTunes Backup File
1. Run the software, select "Recover from iTunes Backup File" mode.
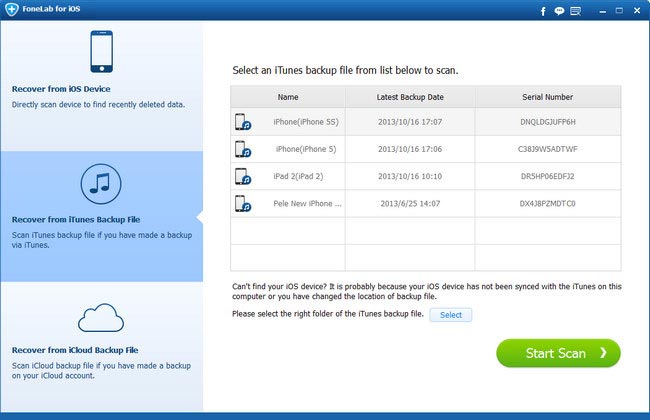
2. Select the backup file you want to recover data from and then click "Start Scan" to enter into scanning mode.
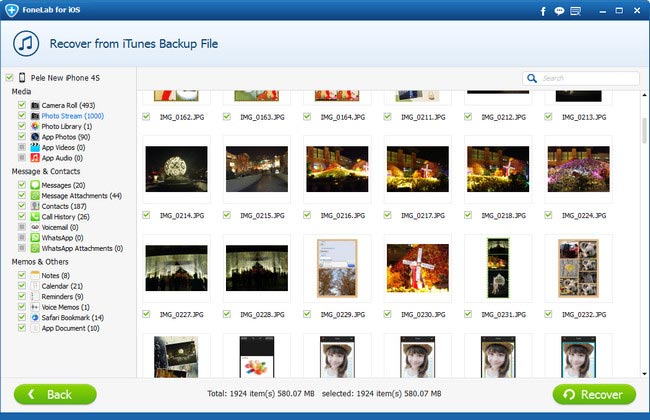
3. Select the files you want to retrieve, click "Recover" to regain and save your data in local disc.
Recover from iCloud Backup File
1. Run the software, select "Recover from iCloud Backup File" mode.
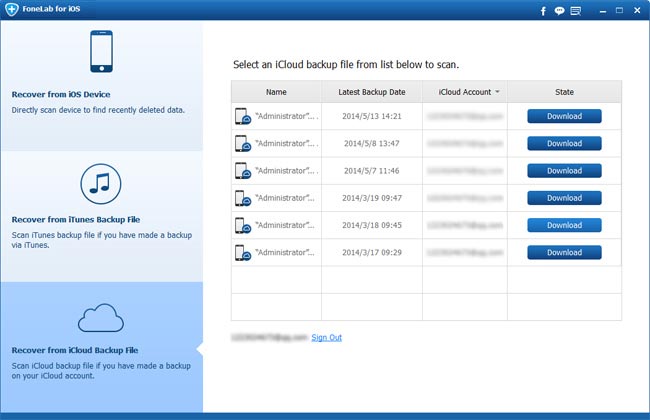
2. Click Download to download the iCloud backup file to your computer. After download, the program will enter the scaning mode automatically.
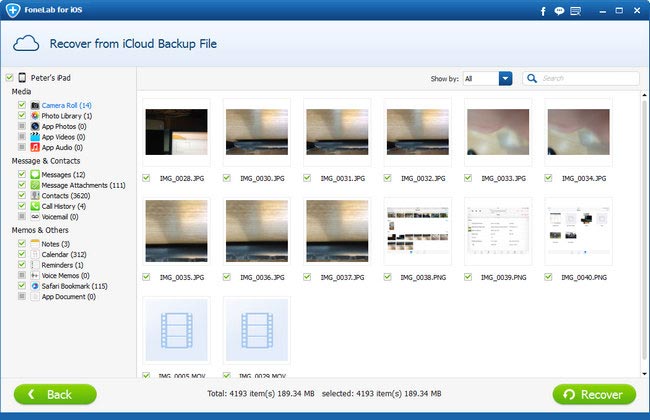
3. Check the files you want to retrieve, click "Recover" button and export your data to computer.
Tips & Tricks
For iPhone 5s, iPhone 5c, iPhone 5, iPhone 4S, iPad Air, iPad mini 2, iPad 4, iPad mini, The New iPad, iPad 2 and iPod touch 5
1. Please make sure you've installed iTunes on your computer and it's the latest version.
2. When recovering data, please don't open iTunes to avoid the deleted data overwritten.
3. Don't use your device when data is lost because it could produce new data to overwrite the lost data and decrease the accuracy of data recovery.
4. For iOS 7 devices, press "Trust" when first connection and follow the instruction on interface to recover your data.
5. If your device has never been synced with iTunes and is password protected, you will be prompted for passcode. Please enter passcode to unlock your device and click "Start Scan" button again.
6. For the content of Contacts, Messages, Call History, Calendar, Notes, Reminders, Safari bookmark and Whatsapp, the scan result includes the deleted and existing data, distinguished by different color. Click "Only display the deleted item(s)" button to display only the deleted data.
For iPhone 4, iPhone 3GS, iPad 1 and iPod touch 4
1. Please strictly follow the three steps displayed on the interface. Both overtime and incorrect operation will cause a failure to enter into device scanning mode.
2. When you are in scanning mode your device screen will be completely black and no operation is allowed. Click "Exit Scanning Mode" button or directly close the software to launch your device into normal mode.
3. If your device is in abnormal mode, for instance, an iTunes logo appears on your device screen, you can restart the program and boot your device into normal mode according to the prompt.
4. Don't use your device when data is lost because that could produce new data to overwrite the lost data and decrease the accuracy of data recovery.
5.The scan result includes the deleted and existing data, distinguished by different color. Click "Only display the deleted item(s)" button to display only the deleted data.
For iTunes Backup File
1. Please make sure you've installed iTunes on your computer and it's the latest version.
2. When recovering data, please don't open iTunes to avoid the deleted data overwritten.
3. If the corresponding backup file of your iOS device hasn't appeared in the file list area, it might be because the device has not been synced with iTunes yet. Please do a backup in iTunes and then retry.
4. When a lock mark appears in the backup list area, it means that the iTunes backup is encrypted and input password to unlock it for scanning.
5. The scan result includes the deleted and existing data, distinguished by different color. Click "Only display the deleted item(s)" button to display only the deleted data.
For iCloud Backup File
1. Please make sure you've installed iTunes on your computer and it's the latest version.
2. Please don't connect your device during recovery, in order to avoid the backup file being updated or modified.
3. If you forgot your Apple ID or password, please click the Forgot Apple ID or Password on the bottom of the program to get it back.
Technical Supports
FoneLab warmly welcomes any of your questions and suggestions. Please contact our support team at: support@fonelab.com. Our customer service staff will give you a response within one business day.